Tuesday, December 31, 2013

January SOTM Blog Hop

A new year is starting, and with it all we wonder what is in our future.  I know I hope for a healthier New Year.  This past year my family, including myself, has had more than it's share of medical concerns.


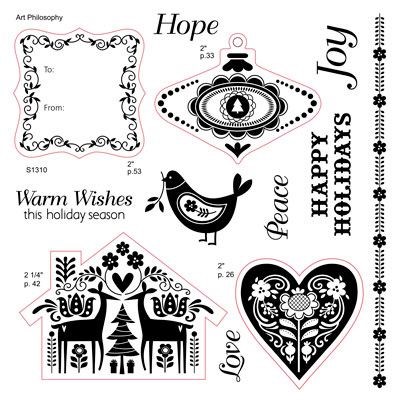
Welcome to our Stamp of the Month Blog Hop!  We will be featuring January's SOTM, which is Crossed Stitched Wishes, a set of 13 stamps.  If you have come here from Teresa Scrivens Blog
 you are on the right path! The blog hop is a great big circle, so you can start here and work your way all around.  If you get lost along the way, you’ll find the complete list of participating consultants here


This month we have approximately 50 Close To My Heart Consultants sharing their creations using this month's SOTM and other great CTMH products on their blogs. This is simple to do - just click on the link at the end of the post on each blog to move to the next one! Here we go!

When I saw this set, I couldn't figure out what to use first.  Since next month is Valentines Day, I decided to make an early Valentines card.  This is how it turned out. 


I stamped a banner using the line stamp and row of small hearts.  I curved the line on my block, then curved the row of hearts right under the line.  This I cut out.  Using the Artbooking cartridge, I used the image of a mini album page, cutting off the holes, and placing this on the top of the card.
I then stamped and cut three hearts...one large and two medium size.  I placed them on the bottom of the card, with the large heart in the middle.  I printed out a saying of Happy Valentines day.

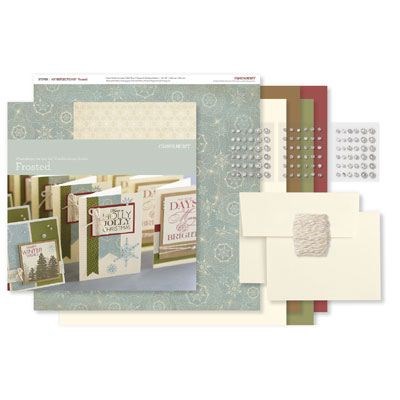
Products Used: CTMH cranberry red cardstock cut into 4 1/4 x 5 1/2, White Daisy cardstock, cranberry ink, other stamp sets, Artbooking cartridge,white ribbon

As I said earlier, I couldn't just make one card.  It was so hard to decide which to use, so I made a second card.   Here it is;


 This time I used a piece of cranberry cardstock, cut into 4 1/4 by 5 1/2, the same as before.  I then, using the Artbooking cartridge, I cut a heart within a rectangle, which was the photo 2.  I used real dial, at 4 3/4", and it fit nicely on the card.  In the center of the heart, I stamped, Love and I put an arrow through the heart.  Using a Martha Stewart punch, I punched a decorative edge on the bottom of the card.  I added bling around the heart shape and then I place 3 small pieces of bling in each of the four corners.  


Now "Hop" on over to Elizabeth Mindemann's Blog to see her work! She has some really creative ideas and I am sure you will like what she does with this stamp set.  Be sure to visit all the Consultants at their Blogs to get some great crafting ideas and other fun ideas! Remember, the January SOTM is only available until January 31!  Contact your CTMH Consultant (or click here) to see how you can get this stamp set at a discount or even free!

Sunday, December 1, 2013

Welcome to our Stamp of the Month Blog Hop!  We will be featuring December's SOTM, which is S1312 Special Care, a set of 6 stamps.  If you have come here from Michelle Loncar's Blog, you are on the right path! The blog hop is a great big circle, so you can start here and work your way all around.  If you get lost along the way, you’ll find the complete list of participating consultants here at Adrienne Brill's blog 

I will be posting my item in a couple of days.  It has been hectic here and I didn't get my item finished.  I have had both my mom and my younger daughter in and out of the hospital, and now Mom is visiting for a couple of weeks to get back on her feet.  I will have something by Monday or Tuesday.  

This month we have many Close To My Heart Consultants sharing their creations using this month's SOTM and other great CTMH products on their blogs. This is simple to do - just click on the link at the end of the post on each blog to move to the next one! Here we go!


Now "Hop" on over to 
Teresa Scrivens  Blog
 to see her work! Be sure to visit all the Consultants at their Blogs to get some great crafting ideas and other fun ideas! Remember, the December SOTM, Special Care is only available until December 21!  Contact your CTMH Consultant (or click here) to see how you can get this stamp set at a discount or even free!

Thursday, October 31, 2013

Illuminate November Stamp of the Month Blog Hop

 Welcome to our Stamp of the Month Blog Hop!  We will be featuring November's SOTM,
which is Illuminate, a set of 15 stamps.  If you have come here from Heather's Blog, you are on the right path! The blog hop is a great big circle, so you can start here and work your way all around.  If you get lost along the way, you’ll find the complete list of participating consultants here at Melinda's Blog.

This month we have 54 Close To My Heart Consultants sharing their creations using this month's SOTM and other great CTMH products on their blogs. This is simple to do - just click on the link at the end of the post on each blog to move to the next one! Here we go!


This is a little card I put together to mail to a friend.  The saying in the top says, "Let your light shine through".  I decided to use some of the paper from our new paper pack, Sparkle and Shine.  I had to decide where to place my lamp post....hmmmm  front or back of the page?  I decided in the front.   I stamped a lamp light, colored it using my honey alcohol marker, cut it out and hung on a lamp post.   There is  a candle inside it  that I colored, then stamped, using my Juniper alcohol marker.  After this all dried, I put a little bit of glitter around the light to give it a shimmer, like you see around a light at night.  I used 2 sentiments from this card set.  On the bottom sentiment, I put it on a piece of ribbon.

Thanks for looking.  Now "Hop" on over to Terri Ann's Blog to see her work! Be sure to visit all the Consultants at their Blogs to get some great crafting ideas and other fun ideas! Remember, the November SOTM is only available until November 30, 2013!  Contact your CTMH Consultant (or click here) to see how you can get this stamp set at a discount or even free!

Sunday, October 27, 2013

Had a group of friends over tonight and we had a cardmaking class using the Frosted paper.  I really enjoyed making these cards and showing everyone how to make their own.  I will be writing up the cutting instructions soon.  Here are the cards:
striped Winter Wishes
Glitter snowflakes


Peaceful forest

ribbon Holly Jolly

Tri-banner Holly Jolly
Snowflake Holly Jolly
Penguin Ornament

Subway art 


3 color winter wishes

Glitter snowflake Holly Jolly

Merry and Bright
If you would like the cutting directions and stamp sets and paper, send me an email and I will sent them to you.  Thanks for looking.

Friday, October 18, 2013

Santa Claus is Coming to Town!

Welcome to the Holidays From the Heart Blog Hop featuring the NEW items from CTMH's Holiday Guide.  Once you've checked out my project, you will see a whole BUNCH of lovely project links below...go check each and every one out and leave some love!


Season's Greetings will soon be heard on a regular basis.  Christmas will be coming soon,  Shortly after Thanksgiving, I will start addressing and mailing my Christmas cards.  I have started early this year, so hopefully I will not have any last minute panics to make more cards.

In the Holiday Catalog, Close To My Heart has several Christmas stamp sets.  The 2 stamps I used come from the set Santa Claus, on page 5 in the Holiday catalog.  Here is the card I made.


On a 5 1/4" x 4" piece of white cardstock, I made my own background paper, using ruby ink  and stamping with the saying, "Santa Claus is coming to Town", all over, then took a small snowflake stamp from the same set and stamped with Outdoor Denim in the white spaces.  

I stamped my Santa Claus twice; once on 1 3/4" x 2 1/2" piece of white cardstock with outdoor denim, then on a scrap piece of Ruby cardstock with Ruby ink.  I cut the hat off the Ruby Santa, and glued the hat onto the white cardstock Santa. I mounted this on a 2" x 2 3/4" ruby cardstock, then mounted it again on a 2 1/4" x 3" piece of Outdoor Denim cardstock.  

 I finally stamped the Ho! Ho! Ho! stamp in Outdoor Denim on three pieces of 1" x 1" square white paper in outdoor denim ink, which I then mounted on a 1 1/4" square of Outdoor Denim cardstock.  

After I put the card together, I mounted the entire card on a piece of 5 1/2" x 4 1/4" Outdoor Denim cardstock.   

This was a lot of fun.  I haven't made my own background paper in a while.  I think this is one card that will be sent to some of those people on my Christmas card list.  I hope you enjoyed the card.  If you would like to purchase this stamp set, or any of our other stamp sets, you can purchase it here, at my website, www.ConnieCreates.ctmh.com


Friday, October 11, 2013

Scrap-booking and card making get Together is on for Saturday!!!!  Come down and see what fun you can have with us.   Bring your pictures, papers, stamps, inks, whatever you need to work.  It will be fun.  At 4:00, I will be teaching a class for a scrapbook layout using our newest Cricut cartridge, Artbooking.  It is really a cute layout, 2 pages, with Grateful and Give Thanks are titles I have for it, but you can change it if you want.  Dinner will be turkey meatball sandwiches, chips, and salad.  After dinner, around 6 or 6:30, I will give you a lesson on using the alcohol markers.  Yes, those of you who ordered the first set of markers…they are in!  We will make a card exclusively for you alcohol marker purchasers. 

I will be placing my next order after you leave on Saturday, so if there is anything you want to order, get your order in right away.  I have gotten many of the new stamps from the Christmas catalog, and they are cute!

There is a new Stamp of the Month for October called Scandinavian Wishes.  If you place an order of $50, you can get this stamp set for only $5.  Now, those of you in the marker buy, that means you need to only order an additional $23.80 

Our next get together will be October 26, and we  will be starting classes to make Christmas cards.  I have a set of cards made for you to look over, to see if you want to take this class.  
You have two options:

Option 1:  You take the class, creating 10 cards.  You will receive 10 blank cards and envelops, the paper needed for the cards, use of my ink and my stamp set, and I will provide any embellishments needed.  Cost to you…$15.00

Option 2: Purchase the Workshop on the Go Frosted for $24.95.  With this kit, you have the ability to make 15 cards, plus you get your own "D" size stamp set (valued at $19.95), and embellishments for the cards.


Next month, we will be making more Christmas cards, using the new Sparkle and Shine set from the Holiday Catalog.  You will have the same choice of options for that also….so think ahead.  

IF YOU ARE INTERESTED IN TAKING THE CARD CLASS, BUT CANNOT ATTEND, DUE TO DISTANCE OR OTHER COMMITMENTS,  LET ME KNOW.  I CAN MAIL THE KIT TO YOU, ALONG WITH DIRECTIONS AND PICTURES, SHOWING YOU HOW TO PUT IT TOGETHER.  JUST LET ME KNOW.

Friday, October 4, 2013

Artbooking Layout

October's My Cricut Craft Room's Blog Hop 


You should have started at http://mycricutcraftroom.blogspot.com/ if not please start at the beginning


Welcome to My Cricut Craft Room's October's Blog Hop 

Collectively the design team and guest designers have made some amazing and special projects to share with you... over 60 projects are on this hop, but it is in less than 20 stops. .  

I have made this great project to share with you today. 
I just love the new Artbooking Cartridge!  There are so many things you can do with it.  It is ideal if you are going to create a layout.  All you do is find the layout you are interested in making, follow the directions for the size to make your layout, and put ONE button to cut it all out!

Here is what I created.


On this side, I cut the overlay at 11", the 5x7 picture photo mat and the title with its shadow at 11"
When cutting the packages diecut, I wanted it to be larger, so I switched to the Real Dial size and cut them out at 6"
I then assembled them  I mounted the packages on white paper, mounted the overlay on the base cardstock of pink Bazzill, put the shadow under the title and  I glued them all down.  After that I glued a white sheet under the 5x7 photo mat


On this side of the layout, I cut the small overlay at 11", a 6"x12" strip of paper, the photo mat trios at ll", 2 small photo mats with a cupcake corner, and the border at 11".  I put some white cardstock in the photo openings so you could see where the photos go.  Then I glued the small overlay on the left and the glued the strip of cardstock on the left side.  Next I glued the 2 small photo mats on the overlay, the tri-photo holder on the cardstock, and the border.


I love how these layout come together.  Just look at those photo mats.  I really like how they are related to the theme.  
Next you should go to Tracey's Blog 


If you get lost along the way here is the entire line up


1. Start http://mycricutcraftroom.blogspot.com/ 
2.  Vivi J http://www.vivijdesigns.blogspot.com/ 
3.  Cindy M http://www.inlovewithpaper.blogspot.com/ 
4. Shawn Mosch - http://craftychicsblog.blogspot.com/ 
5. Liliana Umpierre - http://www.likidesigns.com/blog 
6. Leslie Wrege McGrath - http://scrapnlifeaway.blogspot.com/ 
7. Roberta Swisher - http://queenbeepapercrafts.blogspot.com/ 
8.  April Nourse www.curlsandgrins.blogspot.com 
9. Brenda Knapik -  http://www.disneygirlcrafts.com/ 
10. Lourdes - http://creativecraftsniche.blogspot.com/  
11. Vicki Glenn - http://www.vickiscraftroom.blogspot.com/       
12. Erica http://EricasProjects.blogspot.com/ 
13. Connie Walsh - http://www.ConnieCreates2.blogspot.com/ 
14. Tracey  http://www.thecroppingcanuck.blogspot.com/ 
15. Oh Kissa http://www.ohkissa.com/ 
16. Sandy- http://www.scrapbookblessings.blogspot.com/ 
17. Kris Dietz -- http://http://kreationsbykrisdietz.blogspot.com/ 
18. Mayra- http://mayrasdesigns.blogspot.com/ 
19. Cheryl www.Cricutobessed.blogspot.com 
20. Crafting Blog Events http://craftingblogevents.blogspot.com/ 

**************************************************


Monday, September 30, 2013

October Stamp of the Month for Close to My Heart


Welcome to our Stamp of the Month Blog Hop!  We will be featuring October's SOTM, which is Scandinavian Wishes , a set of 12 stamps.  If you have come here from Nancy's Blog , you are on the right path! The blog hop is a great big circle, so you can start here and work your way all around.  If you get lost along the way, you’ll find the complete list of participating consultants here Helen’s or Kathleen’s blog 

This month we have over 60 Close To My Heart Consultants sharing their creations using this month's SOTM and other great CTMH products on their blogs. This is simple to do - just click on the link at the end of the post on each blog to move to the next one! Here we go!


I decided to use this stamp from the Scandinavian Wishes set.  It is a folksy type of stamp and I lightly stamped it on white cardstock using a light green ink.  While you can use this stamp with just one color, I decided to use my markers to color over the designs.  The light green ink, under it, added to the overall color.  When I finished coloring the stamp, I mounted it on dark cardstock, and added 3 small rhinestone bling.  I folded an 8 1/2 x 5 1/2 sheet of white cardstock in half and using the border stamp in this set, stamped the cute border around all four sides.  Once this was finished, I glued the mounted stamp in the middle, and stamped the 3 words Love, Peace, and Joy above the main stamp.


Now "Hop" on over to Pam's Blog to see her work! Be sure to visit all the Consultants at their Blogs to get some great crafting ideas and other fun ideas! Remember, the Scandinavian Wishes October SOTM is only available until October 31, 2013!  Contact your CTMH Consultant (or click here) to see how you can get this stamp set at a discount or even free!


***

Friday, September 20, 2013


Today’s post is part of the Creative Crafters’ Make a Wish Blog Hop.  I hope you’ve enjoyed your hop so far and I’m glad you’re here.
If you’re coming from Cindy Murray you are in the right place! (If you want to start at the beginning, go back to Cindy, and you will be able to start at the beginning.
Prize
This month, each of us will be offering a prize.  To win, you just need to comment and/or sign up for my newsletter (left). Each comment as well as each new subscriber will be entered to win.
Wishes come in many different sizes and ways.  Christmas, Birthday, wishing to get better, wishing for happiness, wishing to go to a dance, and so on.  Here is my card, 

I used an older stamp from Close to My Heart.  It is a dandelion, ready to go to seed.  I remember seeing them and making a wish.  If you were able to blow all the seeds away, you wish would come true.  (Boy, did my father hate it when I did this.  I never understood why.)

Next on the hop is Laura Hedgecock.  Hop on over to see what she has created out of our theme.

One thing that is often a stumbling block for new scrappers or card makers is trying to decide how you want to lay out your page or card.  Close To My Heart has many different books available to help you get the process started to create your own pages or cards.  

Inside each book you will find layouts for single or double pages, as well as layouts for various numbers of pictures you want to scrap.  It is as simple as ABC. 

  • A.  Look through the book until you find a pattern that you like.
  • B. Gather your papers and cut according to the diagrams listed in the book for your particular layout or card.
  • C. Glue down your cut papers according to the instructions and there you have it!

This video will show you in more detail what you can find in the books.  Check it out!

Now that you have seen how easy it can be, why not order one or two books for yourself.  You can find them in the catalog on page 140. 
Choose from the list below:


Cherish Scrapbook Program ($14.95)
Imagine Scrapbook Program ($14.95)
Magic Scrapbook Program ($14.95)
Reflections Scrapbook Program ($14.95)
Wishes Card Confidence Program ($14.95)
Originals Card Confidence Program ($14.95)

These books feature both scrapbook pages and cards: 


Make It From Your Heart Volume 1  ($7.95)
Make It From Your Heart Volume 2  ($7.95)

Just go to my store and order your own books...those that will assist you in all your scrapbooking and card making endeavors!  Click here to go to my store. 

Monday, September 16, 2013

Project Inspirations: Pocket Album


This is a wonderful thing you can make to save those cards you get for the holidays.  Year after year,you and your family will have the cards to look at and fee that special something you get when to see them later.  This is so easy to make, so why not give it a try.  If you need any help or products let me know.  :)


Tuesday, September 3, 2013


I wanted to share something big with you today...

You can get the CTMH Artbooking Cricut cartridge and SEVEN stamp sets for just $114 (that's only $15 more than the regular Artbooking pricing of $99).

Just $114 before tax and shipping.

Here's the value of the deal shown above:
WOW!  That's a great deal!  

You are getting:

-7 stamp sets
-the Close to My Heart Artbooking Cricut cartridge 
-plus 3 sheets of chipboard shapes (not shown) 
-for just $114
-which has a value of $190.85!

So, if you've been holding off, now's the time to get it!


Click HERE to purchase the 
CTMH Artbooking Cricut bundle and get SEVEN stamp sets for just $114 (before tax and shipping).

Just add the Artbooking Cricut bundle to your cart and the system will prompt you to enter the other sets of stamps.


It's so easy!


Already purchased the CTMH Artbooking Cricut bundle?
That's ok - you can still get the additional stamp sets! 
Check out the deals below:
and the September Stamp of the Month Promo:
Here's a quick link to the online catalog - CLICK HERE if you want a peek. 


Sunday, September 1, 2013

September Stamp of the Month Bloghop.


Welcome to our Stamp of the Month Blog Hop!  We will be featuring September's SOTM, which is Poster Tidings, a set of 2 stamps.  If you have come here from Terry Ann Diack's Blog, you are on the right path! The blog hop is a great big circle, so you can start here and work your way all around.  If you get lost along the way, you’ll find the complete list of participating consultants here at Melinda's blog If you Bling It.
This month we have 58 Close To My Heart Consultants sharing their creations using this month's SOTM and other great CTMH products on their blogs. This is simple to do - just click on the link at the end of the post on each blog to move to the next one! Here we go!


 I stamped this card with Saddle ink (CTMH) using the September Stamp of the Month.  I used Bazzil cardstock for the base and the the second piece of cardstock for matting.  I then put a strip of double sided tape down the seam of the mat and the base of the card.  I place  ribbon in the middle of the tape, the sprinkled gold glitter on the double sided tape.  I took 6 leaf shaped buttons and placed a group in the upper corner and one on the lower corner.
I hope you like it.  

Now "Hop" on over to Melinda'sBlog to see her work! Be sure to visit all the Consultants at their Blogs to get some great crafting ideas and other fun ideas! Remember, the September SOTM is only available until September 30th!  Contact your CTMH Consultant (or click here) to see how you can get this stamp set at a discount or even free!


Saturday, August 17, 2013

SOTM Blog Hop for CTMH


Welcome to our August Stamp of the Month Blog Hop!  This month's stamp from Close to My Heart is "A Chocolate Affair" and is available exclusively through your Close to My Heart consultant from August 1 - 30, 2013.  This month, you can receive this stamp set for FREE with a qualifying purchase.
If you have just hopped onto my blog, please start at the beginning at Lucy's blog – Love 2 Create .   If you came from  Pam  of  Pam's Crafty Creations  then you are in the right place!  

Chocolate is one of my favorites, and I know it is also a favorite things with many of my friends.  This stamp set is perfect for so many things, and it was hard for me to choose which stamp I wanted to use.  Well, after much thought, I decided to use them all!  Look how this card turned out.  M-m-m-m makes me want a chocolate fix just looking at it.  
Once I decided to use all 8 stamps, I went to work.  For the most part, I used Cocoa ink to stamp my goodies.  with the cupcake, cake, sundae, and strawberry, I colored the stamp with my markers, huffed on the ink-covered stamp, and put it on the paper.  

I trimmed around each stamp, rounded each corner, and mounted them on a green paper.  I placed ribbon all around the outside edge of the card and then popped each image up.  

Your next stop on our "Chocolate Affair" hop is Mary of Cr8ive M.E.  Here is the entire lineup in case you get lost along along the way:

  1. Lucy ~ Love 2 Create http://www.love2createitall.com/2013/08/a-chocolate-affair-redux.html
  2. Darla ~ Caution: Crafting is Contagious http://stampingunderdoctorsorders.blogspot.com/2013/08/a-chocolate-affair.html
  3. Rebecca ~ Show Me Scrapping http://www.show-me-scrapping.com/2013/08/a-chocolate-affair.html
  4. Jennifer~ 4 Hearts Scrapbooking http://4heartsscrapbooking.blogspot.com/2013/08/a-chocolate-affair-blog-hop.html
  5. Janna ~ The Creative Princess http://thecreativeprincess.com/a-chocolate-affair-stamp-of-the-month-blog-hop/
  6. Pam~Pam's Crafty Creations  http://pamtrostle.blogspot.com/2013/08/a-chocolate-affair-august-stamp-of.html
  7. Connie ~ Connie Creates 2 http://conniecreates2.blogspot.com/2013/08/SOTM.html
  8. Mary ~ Cr8ive M.E.    http://cr8iveme.blogspot.com/2013/08/a-chocolate-affair-blog-hop.html 


Tuesday, August 6, 2013

Artbooking with CTMH

I just love the new Artbooking Cricut Cartridge!  There are so many different things you can make...cards, minibooks, layouts, and so much more.  I wanted to share a mini book I made for my great-grandson.  He was born in June.  When I cut the mini book out, I covered the holes that were on the side.  I know little fingers will be checking out the book quite often, so I am putting each pages into it's own page protector.  I will add ribbon to the page protector holes, creating the book.


  I started with a simple cover page.


This  page had the scalloped half circle on the side.  When putting it into a page protector, I have it upside down, with a slit at the bottom side, to allow for the half circle.


 For the next couple of pages, I used the overlay for the whole page.  On the opposite page I added a shaped photo holder.  This page also had the word BABY attached to the side page.  The Artbooking Cartridge also had the word "It's a BOY"


 Here I cut a scalloped page and a plain page from the Artbooking cartridge.  Then I added some shapes and rub-on to the page.  The little giraffe on the bottom of the page was part of the baby mini book.


 I have two pages, again, with one of the having scallops around the edges.  They are simple, but you can decorate them as you want.


 A tag was cut from the Artbooking Cartridge and I added some rub-ons and other embellishments.  The saying, Little One, was also a part of the mini book.


Two more pages, one with the scalloped half circle.  I labeled it with some vellum, and it says "Memories."  


Another scalloped page and a plain page.  It also had a small overlay, which fits so nicely on the page.  


 The last couple of pages are here.  Again I used another partial overlay, along with some diecuts...the diaper pins.    

This album has been a labor of love.  I hope my granddaughter enjoys it.    I would love to  hear your comments on it.  Thanks so much.